
Pitas from a Wood-Fired Oven
I never knew how much better homemade pitas were than store bought. They're pretty easy and when you cook them in a wood-fired oven, they get a smoky char that's outrageously delicious. I know everyone doesn't have a wood-fired oven in their backyard like we do (thanks dad)! But, they'll be delicious cooked in the oven too...
This recipe is from seriouseats.com
Pita Bread
Ingredients
Makes 8 breads
- 1 cup warm water (not hot or boiling)
- 2 teaspoons active dry or instant yeast
- 3 cups flour
- 2 teaspoons salt
- 1-2 teaspoons olive oil (optional)
Directions
Mix the water and yeast together and let sit for about five minutes until the yeast is dissolved. Add 2 1/2 cups of the flour (saving the last half cup for kneading), salt, and olive oil. Stir until a shaggy dough is formed.
Sprinkle a little of the extra flour onto your clean work surface and turn out the dough. Knead the dough for about 10 minutes total, until the dough is smooth and elastic. Add more flour as needed to keep the dough from sticking to your hands or the work surface, but try to be sparing. It's better to use too little flour than too much. If you get tired, stop and let the dough rest for a few minutes before finishing kneading.
Clean the bowl you used to mix the dough and film it with a little olive oil. Set the dough in the bowl and turn it until it's coated with oil. Cover with a clean dishcloth or plastic wrap and let the dough rise until it's doubled in bulk, 1 - 2 hours.
Pre-heat the oven to 450°. If you have a baking stone, put it in the oven to heat. If you don't have a baking stone, place a large baking sheet on the middle rack to heat.
Gently deflate the dough and turn it out onto a lightly floured work surface. Divide the dough into 8 equal pieces and gently flatten each piece with your hand. Sprinkle the pieces with a little more flour and then cover them with a kitchen towel or plastic wrap wrap until you're ready to bake them.
Using a floured rolling pin, roll one of the pieces into a circle 8-9 inches wide and about a quarter inch thick. Make sure the dough isn't sticking to your counter and sprinkle both the dough and the counter with a little flour if it is. Roll out as many pitas as will fit in your oven at once.
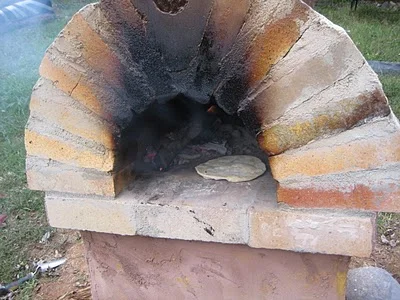
Place the rolled-out pitas directly on the baking stone or baking sheets and bake for about 3 minutes. We find it most effective to lay the pita flat on the palm of our hand and then flip it over onto the baking stone. The pita will start to puff up and is done when it has fully ballooned.
If your first pitas don't balloon, don't worry! Pitas are a bit like crepes in that the first few don't always work. Un-ballooned pitas are still delicious and can be folded in half to create a pouch for fillings.
Pita is a great make-ahead bread. You can prepare the dough through the first rise, punch it down, and then keep it refrigerated for up to a week. The flavor will actually improve! You can bake the whole batch at once or cut off just what you need to make one or two flatbreads at a time. When you're ready to bake, cut the dough into portions, flatten them slightly, and let them come up to room temperature before baking.
You can also easily make a double batch of dough if you need more pitas. All the ingredients can simply be doubled, but increase the yeast and the salt to just one tablespoon each.